


Private Internet Access (PIA) Giving You Headaches? Here’s How to Cancel and Get a Refund


Let’s face it, finding the perfect VPN is a bit like dating. You might be drawn in by promises of blazing speeds and impenetrable security, only to find the reality doesn’t quite live up to the hype. Private Internet Access (PIA) often stands out with its appealing price point, but as Engadget’s review points out, sometimes that “budget” feel creeps in. If you’re experiencing inconsistent performance, frustratingly slow speeds, or simply decided PIA isn’t the right fit, you’re probably wondering how to cut ties and, more importantly, get your money back.
This guide will walk you through the process of cancelling your PIA subscription, requesting a refund (if eligible), and even deleting your account entirely if you’re looking for a clean break. We’ll break it down into easy-to-follow steps so you can move on to a VPN that better suits your needs.
How to Turn Off Auto-Renewal for PIA
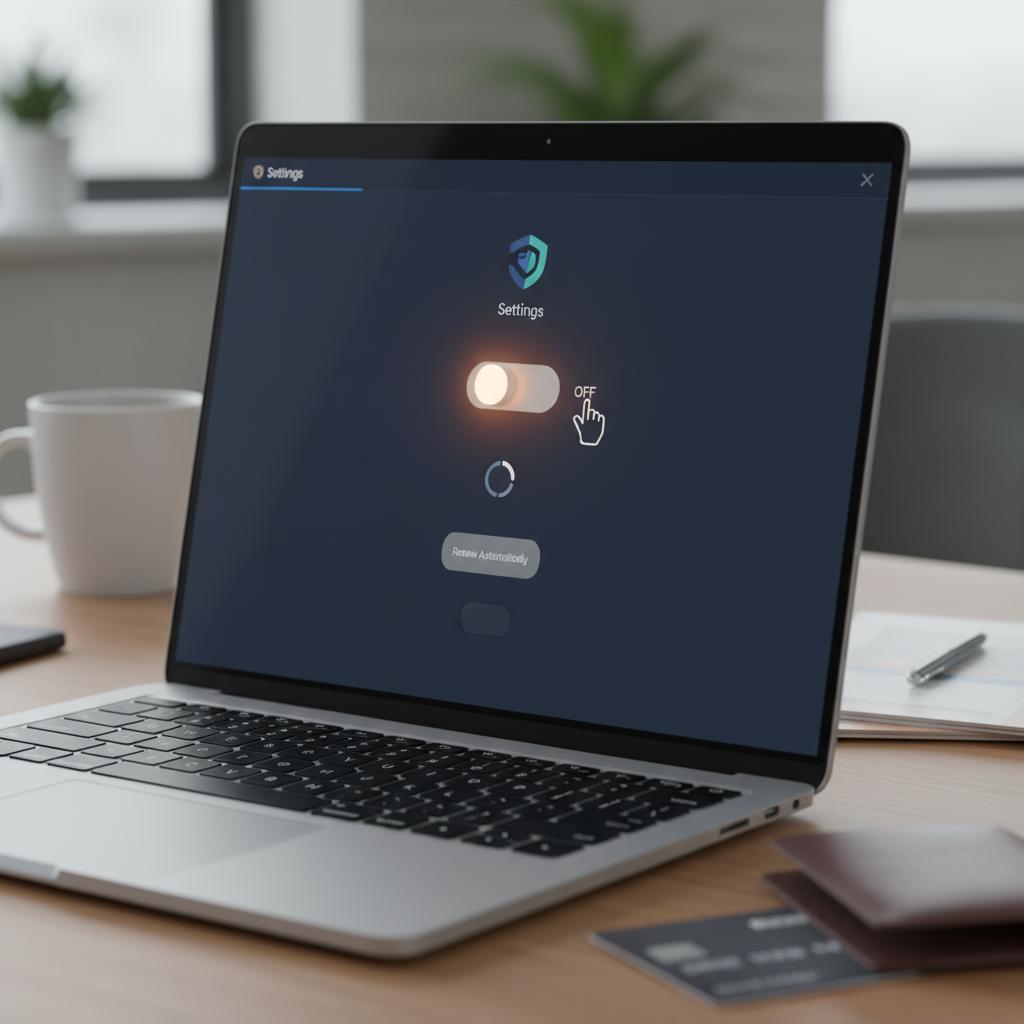
The first step in cancelling your PIA subscription is disabling auto-renewal. This prevents your account from automatically being charged for another subscription period. Luckily, it’s a pretty straightforward process.
1. **Log in to your PIA account:** Head to the Private Internet Access website and log in using your username and password.
2. **Navigate to the Subscription Settings:** Look for a section typically labeled “Subscription,” “Billing,” or “Account Details.” The exact wording might vary slightly.
3. **Disable Auto-Renewal:** Within your subscription settings, you should find an option to disable auto-renewal. This might be a toggle switch, a checkbox, or a button. Click or uncheck it to turn off automatic payments.
4. **Confirm Your Choice:** You may be prompted to confirm your decision. Follow the on-screen instructions to finalize the cancellation of auto-renewal. You should receive a confirmation email as well.
It’s crucial to disable auto-renewal before your subscription renewal date. If you miss the deadline, you’ll likely be charged for another period, and getting a refund becomes more complicated.
Requesting a Refund from Private Internet Access
PIA typically offers a 30-day money-back guarantee, which allows you to try their service risk-free. If you’re within this timeframe and unsatisfied, you can request a refund. Here’s how:
1. **Contact PIA Support:** The most reliable way to request a refund is by contacting PIA’s customer support. You can usually do this through their website via live chat or by submitting a support ticket.
2. **Explain Your Reason for Cancellation:** When contacting support, clearly state that you’re requesting a refund due to dissatisfaction with the service. Briefly explain your reasons (e.g., slow speeds, unreliable connections, issues with specific servers). Be polite but firm.
3. **Provide Your Account Details:** Be prepared to provide your account information, such as your username, email address, or order number, to help the support team locate your account.
4. **Follow Their Instructions:** The support team will guide you through the refund process. This may involve answering additional questions or providing further details. Be patient and cooperate with their requests.
5. **Check Your Payment Method:** Once your refund is approved, keep an eye on your original payment method (e.g., credit card, PayPal) for the refund to be processed. The processing time can vary, so allow a few business days.
Keep in mind that refund policies can change, so it’s always a good idea to review PIA’s current terms of service on their website for the most up-to-date information. If you encounter any issues, don’t hesitate to follow up with support.
Deleting Your PIA Account (Optional)
While cancelling your subscription and receiving a refund might be enough, some users prefer to completely delete their account. This removes all your personal information from PIA’s servers.
1. **Contact PIA Support:** Similar to requesting a refund, the best way to delete your account is by contacting PIA’s customer support.
2. **Request Account Deletion:** Clearly state that you want to delete your account and remove all associated data.
3. **Verify Your Identity:** PIA support may require you to verify your identity to ensure you’re the legitimate account holder. Be prepared to provide any necessary information.
4. **Confirm the Deletion:** Once your request is processed, you should receive a confirmation that your account has been successfully deleted.
Deleting your account is irreversible, so make sure you’re certain about your decision. If you think you might want to use PIA again in the future, simply cancelling your subscription might be a better option.
Moving On to a Better VPN Experience
Cancelling PIA might be a little frustrating, but remember that there are plenty of other VPN services available. Take some time to research and compare different options based on your specific needs. Consider factors like server locations, speed, security features, and customer support. Don’t be afraid to take advantage of free trials or money-back guarantees to test out different VPNs before committing to a long-term subscription. Finding the right VPN can significantly improve your online security and privacy, so it’s worth the effort to find one that works perfectly for you. Good luck in your search!